Here at Arcadia Knives hand crafted knives have a soul. They are created with care, sweat and fire. If you are looking for a knife that you can pass down to your children then look no further.

Thursday, July 10, 2014


From Then Till Now

I think I say this every time but it sure has been a long time since the last time I posted here.  We did a couple shows that were very unsuccessful.  People liked everything but the wallets weren’t coming out.  Guess times are pretty tough. 


We did finally put a display in “Wild Duck Soup” shop in Centerville, TN.  Antonia, who runs the shop is a friend of our friends and she has been wanting some of my goods in there for a while now.  Gotta have some guy stuff in there.  Let’s hope it works out for both of us.


Kittens For Sale!!!


My cat Kato had a litter of kittens on April 24th.  She dropped them behind my hops vines.  All the kittens were females and three of the five had bobtails.  The father was a black bobtail tom that hasn’t been seen since.  We didn’t have any problem finding homes for them as they were pretty darn cute.   After weaning, momma cat was taken in to be spayed so there’ll be no more little ones running around!


Rawhide!

One of my goals for the year was to start making frontier rawhide sheaths.  As seen in a previous post I did make my first deer rawhide.  I purchased a DVD from John Cohea on Rawhide Sheath Construction and watched it a few times.  Next thing to do was make a list from it for proper construction sequence.  There were over 120 steps involved to create one of these sheaths.  It took me close to 10 hours time to put it all together, but I think it really is worth it.  Once you start the process with the rawhide parts, you have to keep working until it’s all stitched up and ready to dry.  After the rawhide is dry it is some tough stuff, almost bulletproof. 


The knife is a full tang bowie, antiqued blade with filework.  Handle is curly maple with acid stain. 


A Matched Set

After that was done I finished the initial grinding on a set of kitchen knives.  These were the first stainless steel blades that I’ve worked on.  They had to be sent out to be heat treated and came back at a 59 Rockwell hardness.  After heat treat all the blades needed to be thinned down on the grinder.  This 154CM seemed to eat up my sanding belts.  They say to use’m like somebody else is paying for’m.  I really had to go through the grits on these blades.  I don’t usually grind as much as on these blades, but it sure was some tough stuff.  If they weren’t for my sons wedding gift I might have given up on them.  The amount of hand sanding was incredible, more than any knives I have ever worked on.  Piles and piles of used sandpaper filled up my wastebasket.  There was literally Blood, Sweat and Tears put into this labor of love.


The set included a 3 ½” paring knife, an 8” slicer, an 8” chef knife, a meat fork, a knife steel and a magnetic strip that all matched.  The handles were made from Manzanita burl, which looks like a redwood type with deep reds and brown coloring.  Handles were attached with Acraglas and stainless corby bolts to give both chemical and mechanical bonds.  Luckily the knife set was finished just in time.  Going to get some better pictures soon.

We drove up to Wisconsin for Sam & Mara’s wedding by way of Janesville, WI to drop off the last of the kittens to my mother in law.  We were getting pretty attached to Lily but was glad to have her gone.


The Hitchin’

Sam and Mara’s wedding was so beautiful.  The wedding ceremony and reception was held at Triglav Park in Norway, WI.   

They make such a wonderful couple!   

The weather was warm…with a jacket on anyway, but such a gorgeous day for them.  A light sprinkle came down after the ceremony which cast a rainbow of the lake.  I do believe they got a few pics with the rainbow.  The pavilion was decorated by Sam’s mom, Andrea, and everything looked great.  She also made soaps for all the guests to take.  Thanks to her for her work.  The dinner was catered by Firemen BBQ.  They brought an old fire truck which is their trademark.  It got stuck in about a foot of mud, but got her pulled out during the dinner.  Their dinner included RIBS, Bacon Wrapped Pork Loin, did I say Ribs? and some fresh hot sausages.  Oh yeah they had some sides too, but I was diggin’ those ribs.  First time ever having ribs at a wedding…SCORE!

The band they had really rocked the party.  They played so many good tunes and played them well.  It was so nice to be a part of something so special.  Sam is a really great man and Mara is such a beautiful caring woman.  I can imagine that they will enjoy a wonderful life together. 

Peace Man

After the ceremony and before the dinner Leslie and I talked with Rev. Paul and his lovely wife Barb.  Paul and I were talking music and he informed me that he purchased the negatives/rights to the pictures of The Beatles performance in Milwaukee, September 4, 1964 at the Milwaukee Arena.  He is a collector of Beatles memorabilia and this helps pay for more stuff.  He told me, after seeing my brochure, that he’d like a peace sign necklace made up for an upcoming Beatles collector show.  He gave me some ideas and from there I created a one-of-a-kind piece that I think he will really like.

The Peace sign is carved from mammoth tusk, or ancient ivory.  At the base I scrimshawed BEATLES into it.  The ivory was inlet into a piece of ebony that came from the Gibson factory intended as a fret board.  I kinda thought the relation between those pieces would bring more meaning to the work.   

Paul’s favorite Beatles song is “Can’t Buy Me Love” so I made a stamped copper keyring for him.  His wife Barb gets a pair of earrings that were made from the wood of the knife at the top of my blog page.

We had a nice brunch Sunday morning at the Boerner Botanical Gardens with Sam & Mara, her dad Mick & Michalena, Bob & Jess with Bobby and Henry.


Hittin' The Road

We headed home at 3:30am Monday June 30th.  By the time we hit Gurney heavy rains started and did not relent until we got into Indiana.  I was wore out by 7:00am and still had almost 8 hours to go.  We did take our time and just enjoyed the rest of the ride.  After getting home I let Kato out of the chicken tractor where she had been recuperating since being spayed the week before.  That was one happy cat. 

Pickin' Anda Grinnin'
I spent the week working on Paul’s Peace sign necklace and had to work on July 4th so we didn’t go anywhere to see Fireworks.


On Saturday July 5th we had a show in Savannah, TN at the 36th Annual Bluegrass Festival.  This was our first time there and didn’t sell much, but we were impressed by the caliber of musicians that played at the show.  Next year we’ll try to get some friends to go along for the music.

That’s about it for now.  There are two commission knives on the bench that need to be worked on next and a bunch more to put together.   When they are done I will post pics of them.

Monday, May 19, 2014

Put The Hammer Down!


After seven months of rebuilding, refurbishing and great anticipation, my Little Giant Power Hammer has found its permanent location in my shop.  I’ve been moving it around and keeping it lubed up for the last three and a half months. 

First thing I had to do was drill holes in the wooden base and transfer those holes to the concrete floor. 


It was another week before I got the materials to epoxy the bolts into the floor to bolt the base down to.

After the epoxy and bolts were set, I hoisted the hammer up to take the wooden base off.  The base was slipped over the floor anchor bolts.  The washers and nuts weren’t put on until later that night after the epoxy had a few hours to set up a bit.  Full cure usually takes 24 hours or more.


The hammer has found its final resting place. 

Time to “Put the Hammer Down”.  Fired up the coal forge and try it out.  This thing can sure move hot metal.  To me it runs a little too fast.  Might have to tame the beast a wee bit.  I only tried out some thin stock so maybe something a little bigger will work better.

____________________________________________


Hanging Out

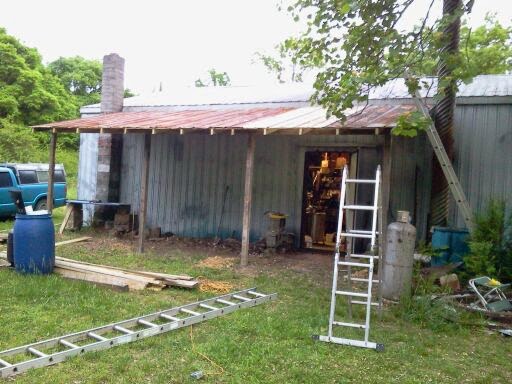
Well, I have planned an overhang off the back of the workshop for some time now.  This would be used as a “Smithy” or a place I can use my coal forge.  Materials were gathered wherever I could find them.  Most were recycled or reused. 
With the help of Chase we set four posts and concreted them in on May 4th.
The next day, Monday, I hung the horizontal members across the posts and along the top of the outside shop wall.
Tuesday I went to buy nails, rafter supports and 2x4’s.  Then I put up the metal rafter supports and cut the rafters to length.

Wednesday I got the rafters set in place and all screwed in.

Finally after climbing up and down those stupid ladders all week, I got all the tin nailed down.  There were a couple fiberglass panels that I put up right over the doorway.  I was completely spent when it was all finished, but glad to have it up.  It ain't no thing of beauty but it will be a cool spot in the summer for me to sit back when things are too dang hot inside the shop.  Total cash investment was about $70. Not Bad!!!

__________________________________________

Cuttin’ Up

Here is a chef knife that I recently finished for a local customer.  This knife really turned out to be a challenge for me.  Things don't always go as planned but challenges make for more learning.  Its shape was taken from a knife the customer liked but wanted in carbon steel.

The blade is 1095 High Carbon steel.
Handle material is stabilized Black Ash burl.
Overall length is 13” with an 8” blade that is almost 2" wide.

I’m sure he’ll be Cuttin’ Up lots of good things with this knife.   
Thanks


Monday, April 28, 2014

Move’Em On, Head’Em Up…RAWHIDE!!!


My latest venture into the knife making world will be to create rawhide knife sheaths.  It started when I saw my first Karen Shook sheath for a Daniel Winkler knife.  It was so freakin’ cool.  There was no way of knowing how the thing was put together or how much work went into it.  Hence the long time in between my first view and now. 

A very nice knife maker in Mississippi named John Cohea thought that type of sheath would fit his knives so he figured out his way of making them.  I recall a few years back when I called John and asked if he could show me how to make them.  He said yes but I never got over there.  He works on a boat so he is gone almost 8 months out of the year.  Well, following him online resulted in finding out that he made a video on “Basic Rawhide Sheath Construction”.  I was lucky enough to order the video before it even came out. 

He gives a thorough demonstration of the entire process which takes him quite a few hours to make.  After watching the videos a couple times so far I decided it’s time to tackle this project.

As with most of my endeavors I try to do as much of it as possible.  So I start out by pulling two deer hides out of the deep freeze.  There’s another on or two in there and a bunch of beaver hides waiting to be turned into something useful.  It takes at least three days for the hides to thaw in the shop fridge.  According to a guy online, he soaks the hide for 24 hours before fleshing the hide.  This gets most of the fat and flesh off so it doesn’t rot.  


Fleshing is a little easier after the soak but it is kinda messy. 


 After getting off what I can the hides go into a barrel with water and wood ashes or you can use hydrated lime.  There they will stay for 7 days, stirring daily to distribute the solution evenly.  The result of this action is to cause all of the hair to slip off. 
 

I thought that this would happen in the barrel and I’d pull out two cleaned hides at the end of the week.  Nope.  I pulled one out and put it on my fleshing beam which is a piece of old pvc pipe that had split in a water break.  All it took to get the hair off was scraping it with an old butcher knife.  I put a garbage bag at the bottom of the beam and all the hair went cleanly into the bag.

Next the hides had to be put into clean water for another 24 hours.  This helps get the lye out of the skin and neutralizes it.  I stirred this every time I passed the barrel.


The next day I built a frame to stretch the hide on.  I pulled one of the hides out and started punching holes along the edge and used jute twine to tie it to the frame.  The process began with two pieces at one end of the hide.  Then I tied up the other end and worked my way around the whole hide.  Everything was stretched as far as it would go.  This helps to thin it out.  You can see in the picture a new tool I made to scrape the hide once it was stretched.  The scraping gets any bits of flesh that I didn’t get off before.  This process took quite a while on the first one.  This hide turned out really nice and it was thin all over.

Hide number two was quite a bit bigger and so darn thick in some places.  It had been in the freezer for at least two years and had some bad spots on it that had to be addressed at the initial fleshing.  The frame for this one measured 5 x 7 feet inside.  It took a bit more elbow grease to get this one stretched out.  The hide had to weigh three times as much as the first.  
  
When I started scraping this hide I was thoroughly disappointed in how little was coming off.  This hide had a lot more stuff attached to it that had to come off.  I had seen a video of a guy using a wire wheel to clean a hide so I got an angle grinder out and gave it a try.  OMG!!!  What a quick way to clean it.  There was the drawback of stuff flinging all over the place.  Next time I’ll do this outside.  It was raining so I’ll use that as an excuse.  It had to have saved me at least two hours of work.

Now the hides have to dry for a while.  The small one is probably ready to work with but there is a lot of stuff going on right now so it will be a couple weeks before I tackle the rawhide sheath itself.

Leslie will be at the Hole-In-Wall Show in Hohenwald, TN this Friday and Saturday, May 2&3.  I will set up a small table at Ace Music Fest on Saturday May 3rd. 


Wednesday, April 16, 2014

26th Annual Batson Bladesmithing Symposium 2014


26th Annual Batson Bladesmithing Symposium 2014

First day off in who knows how long???  I left W’boro at 06:45am.  The ride was nice, and weather was fine.  Got down to Tannehill State Park by 10:30am and registered right away. I found a camp site close to all the action and a small creek, got my sales table out, set my tent up and ate some lunch.  The next thing was to hit the vendors before the first afternoon class.  Bought some curly maple blocks and steel.


Batson Bladesmithing Symposium is held at Tannehill State Park near McAlla, Alabama www.tannehill.org .  This was the 26th year the event took place.  It was held April 10-13.  The cost for the weekend is $100 which includes a 1 year membership to the Alabama Forge Council, the bi-monthly subscription to their magazine Bituminous Bits, all the classes Friday-Sunday, camping at the park and a BBQ dinner.  As the name implies it is primarily forge oriented.  It is sponsored by the Alabama Forge Council www.alaforge.org and the American Bladesmith Society www.americanbladesmith.com . 

Demonstrators from around the country come to teach at the facilities.  This place is outfitted with everything necessary to teach all aspects of knife making and forging.

It all starts on Thursday with a demonstrator’s dinner.  Registration and check in begins bright and early on Friday at 7:00am with classes and demonstrations starting at 8:00am.  Classes run from 8-10am, 10-12pm, 1-3pm and 3-5pm Friday. Saturday and Sunday classes run 8-10am & 10-12pm.  There are 3-5 classes to choose from for each time slot. 

Your choice of classes include: forging, blade grinding, handle & guard construction. wire inlay, leather sheaths, jigs & fixtures, knife design, many Damascus techniques, engraving, scrimshaw and more.  This is by no means all that are offered.  Most of the classes are offered more than once so the chances are good that you’ll get to attend all the ones you want to.


The classes I took Friday afternoon were both taught by Master Smith Joe Keeslar.  The first was on leather sheaths.  He has done leatherwork since he was a teen.  The quality of his work is amazing and makes it look so easy.  Joe went over design, cutout and putting together a leather sheath from start to finish.  He demonstrated different ways of stitching as well as sheath embellishments.  The second class was on knife design.  We all discussed primary uses for knives and their particular design criteria.  Joe had us each design a large and small knife.  Our designs were constructively critiqued and we all ended up with nicer designs.  He asked us to create the knives we designed and bring them back next year to show.

You will find tailgate sales around the grounds.  There are all kinds of knife related wares for sale.  Some of the things this year included grinders, anvils, post vices, hammers, forges, firebrick, abrasive belts, leather, books, dvd’s and lots of steel.  Much of the steel is round bar for forging.  Aldo Bruno drives down from New Jersey to sell his steel.  His truck is loaded with flat bar.  He sells quite a bit of steel to make Damascus.  He usually makes a killing just after any Damascus class lets out.  The best part is no shipping charge when you buy from any of the vendors.  Anyone is allowed to put their materials out for sale and you just price everything and leave a bucket to put the money in and you’re good to go.  It is best to buy what you want fast because a lot of it goes quick and then it’s not available.  

I sat and talked with Aldo Bruno for a while.  He talked about some rough times this past winter and his hopes of doing more for all the knife makers out there.  His steel is some of the best available and he has recently purchased a waterjet machine.  He’s in the process of getting it ready to cut knife blanks out.  Many companies with a waterjet cater to differing industries, but Aldo wants to work for the knife makers alone.  If you produce a knife or knives over and over, the cutout work can be done on a waterjet.  The best part is you can buy your steel, have the blades cut out there and shipped to you from one company.  That will save a bunch on buying steel one place, shipping to another and paying for return shipping.  If you make a bunch of the same knife, this process can save you time and money.  I can see having my regular hunters and utility knives cut out, but most of mine are one-offs so those could only be done by me.  Aldo said the services should soon be offered on his website www.newjerseysteelbaron.com. 

There are going to be more forged knives coming out so it just may be the time to join the ABS.  I’ve wanted to join for some time and after talking to JS Dwight Phillips from Lawrenceburg, TN he made me want to join now even more.  Dwight is a Journeyman Smith in the ABS and has his 5 knives almost ready to judge for his Master Smith stamp.

After classes were done on Friday there was a free BBQ offered from 5-7pm on the other side of the park.  They had burgers, smoked sausage, hot dogs and some of the best baked beans I ever ate.  The comradery was great and all the talk was about knives and knife making. 

The evening festivities commence back at the Vulcan pavilion with a cutting competition.  Everyone is allowed to enter the competition.  All you need is a sharp knife with a forged blade 10 inches or under & total length not over 15 inches.  The handle must be pinned and have a wrist thong for safety.  There were 8 guys that entered and their knives were checked over by the safety official.  The events are random each year and this year 6 events were scheduled.  1st event was to take one chop at a 2x4 at a 45 degree angle.  The deeper you chopped the more points you got.  2nd event you had to stab the knife tip 1/8-1/4 inch into a 2x4 and pry out a chip.  Most did it but one tip was broke off.  Glad it wasn’t my knife.  3rd event was to poke a tennis ball with your knife tip and lift it to shoulder height. 4th event had a roll of toilet paper with a few sheets hanging down and you had to slice it cleanly with out tearing.  5th event you had to chop a ping pong ball and the 6th event was chopping a golf ball.  The overall winner for the night was Russell White.  I gotta tell y’all that these events sound way easier than they are to perform.  I competed in 2011 and only accomplished one of the required tasks from that year.  If you haven’t done any of these things give it a try.  There are folks that are professional cutters and can do amazing things with their knives.

Saturday started with classes at 8am.  The class I took was taught by Mickey Wise and was on Old Timey Knives.  Mickey went through the forging process of a small blade.  His hammer blows were easy and it seemed like he hardly hit the steel.  Next he drilled a piece of antler for it.  He then broached the antler to fit the tang snugly using home made scrapers, discussing how we can make or own.  Mickey got out a blade he had previously heat treated and showed us how to pour a pewter bolster.  From that point the bolster had to be cleaned up and feathered into the antler handle. 

The weather in Alabama was beautiful with morning temps of low 50’s and daytime temps of around 80 degrees. 

Classes only go till noon on Saturday with a knife show to start the afternoon off.  The knife show is open from 1-3pm for any demonstrator or attendee to put their knives out for display/sale.  It is held in the open on picnic tables, with a large pavilion nearby in case of inclement weather.  There were about 15 tables set up with a lot of nice knives being shown.  The show usually begins with Rail Road Spike Knife judging.  I’d have to say there were probably a dozen RR Spike knives out.  One was made from Damascus and one had an MS stamp on it.

Next up is the auction conducted by Col. Tim Ryan.  It begins at 3:00pm.  Everything auctioned off is donated for Iron In The Hat by demonstrators, attendees and vendors.  All proceeds go to the Alabama Forge Council building fund.  Many interesting items turn up for the auction as well as some very nice knives.  Joe Keeslar offered a 3 day workshop at his shop which sold for over $600.  This is an interesting part of the weekend.

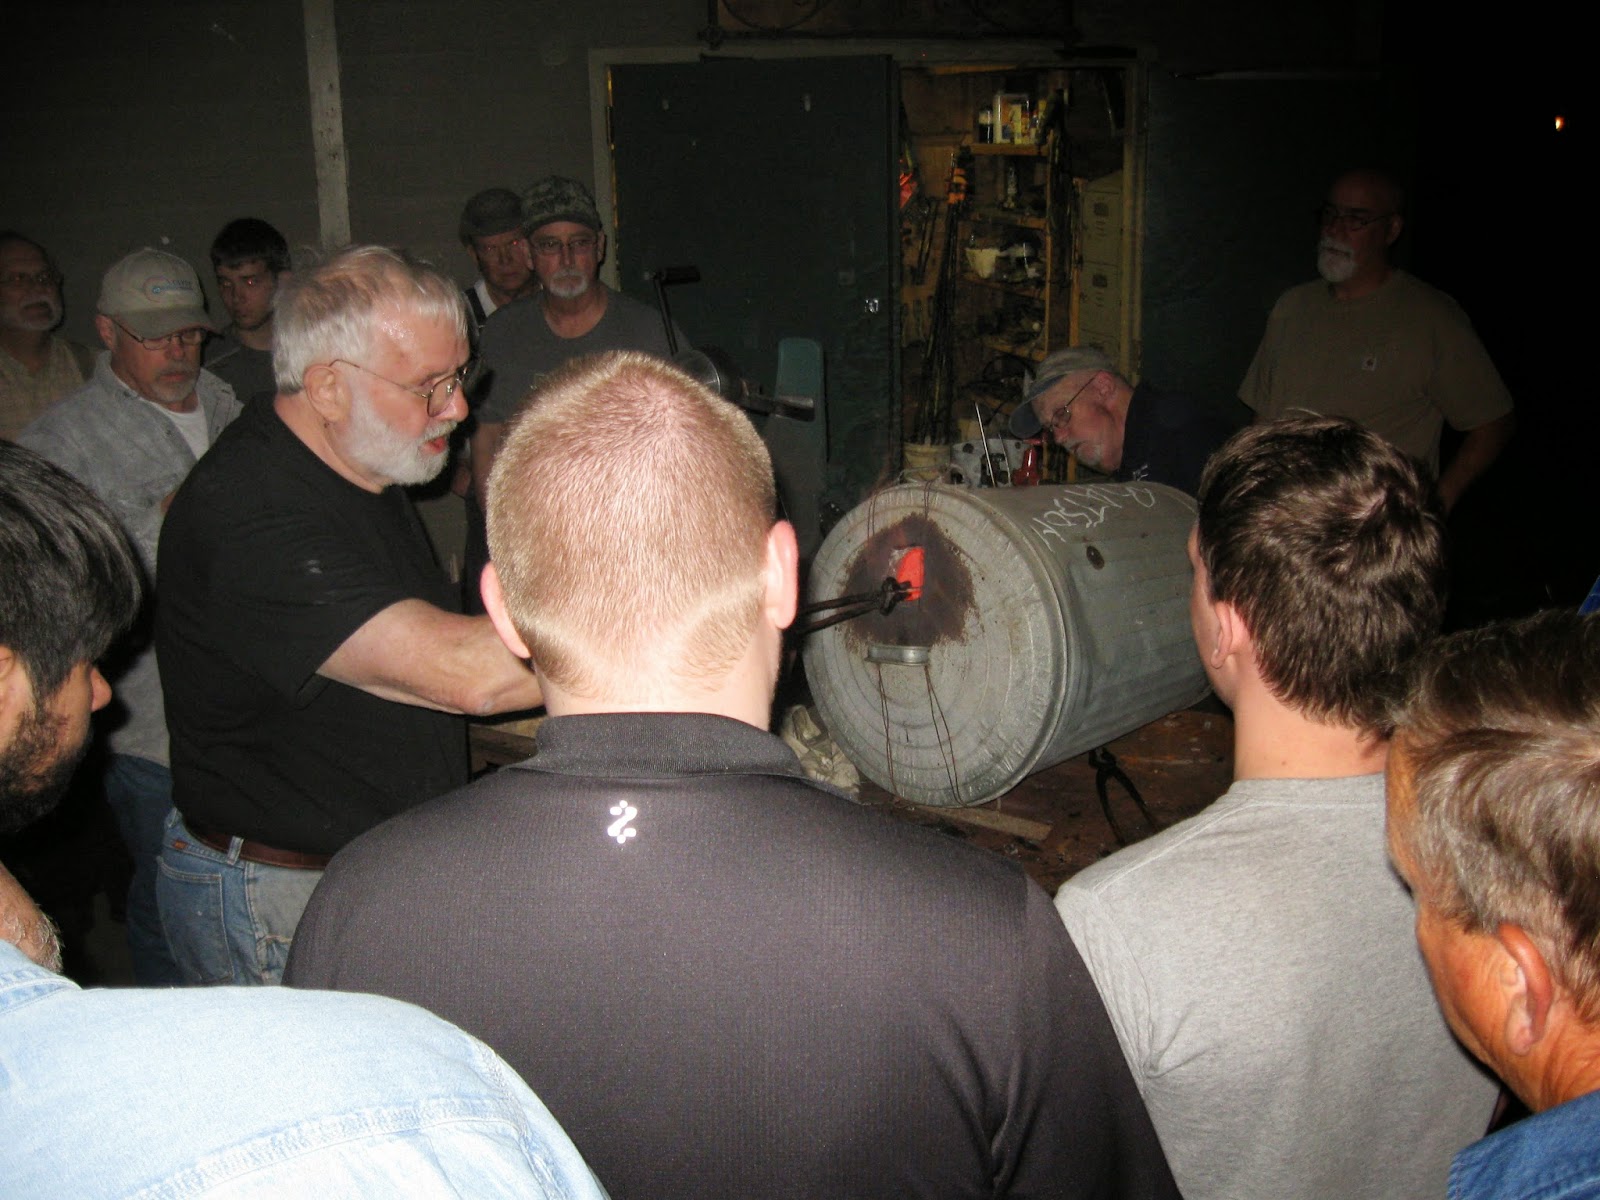
Saturday evening held the Heat Treat Extravaganza.  Dr. Batson explained heat treat curves and properties of steel during the process.  He then proceeded to heat treat a number of blades with the emphasis on everyone seeing the transformations that take place while heating.  Canola oil was used to quench the blades so we could see what happened in the oil as the steel was being cooled down.  The blades were put into vermiculite until ready to put in the oven.

Usually Tannehill Iron Works does an iron pour on the Saturday of the Bladesmith Symposium which was scheduled on the website.  There was flooding the weekend before so it had to be cancelled.  A group of volunteers prepare the furnace and keep it burning.  It is opened up after dark with the molten steel flowing into crucibles carried by two-man teams and poured into small castings.  You pay a fee of about $20-25 to create your own flat castings.  People from all over the park do their castings during the day and they get to take them at the end of the night.  I watched in 2011 and hoped to do a casting of my touchmark this year.  There will be another pour Sept. 7th when the Alabama Forge Council has their fall conference at the park.  Tannehill has a lot of history, so if you have a chance to go through the park, I’m sure you will enjoy it.

The final day only has 3 classes at 8-10am and 3 classes at 10am-12pm.  Things are winding down and a lot of folks are packing up and heading out.

If you ever have the opportunity to attend the Batson Bladesmithing Symposium go for it.  The amount of knowledge there is amazing.  Any thing you want to know about forging knives or Damascus is available by simply asking.  You won’t be disappointed


Thursday, March 27, 2014

Oh What A Year 2014 Has Been!!!


Whoa!!!!  It has been quite a while since I’ve updated the ol’ blog.  So much has happened since my last post


In early January my cat had to have a bit of surgery.  Since that time she made a full recovery.  For some time after, she was a little freaked out by everything.  Within the last few weeks she has been returning to my workshop to supervise. 

It seems that bad luck was the norm for the first quarter of the year.  Electrical issues in the shop prevented me from any production in January and February.  With some help from my buddy the electricity was running without any hiccups.  I ran new wiring for the hammer and moved the light switch to a more convenient location.


When the electrical problems first started I thought I’d be able to work around the issue.  Negative.  My 14” bandsaw was still working.  Oh yeah, it crapped out two or three days later.  The motor just died on it.  I spent quite a while looking for a 230v motor for it without any luck.  Then a buddy gave me a motor almost as old as the saw.  As my luck would have it, there was no wiring diagram on it OR at the manufacturer.  They told me their records didn’t go back that far.  Saw gets moved to the side for now.

On to the benchtop bandsaw that I have.  It only gets occasional use but comes in handy in a pinch.  My plan was to sell it to a friend.  Then I need it.  A couple of knife handles later it is starting to sputter and squeak so loud that I need ear plugs.  Saw number 2 taken offline!

I am starting to get mad now.  What else can happen?  Don’t EVER ask this stupid question because there is always something waiting to smack you down.

There are two drill presses in the shop.  One is a 12 or 16 speed floor standing model and the other is a small 5 speed bench model.  They are each used for different processes.  The large one is able to drill larger holes and can’t take any bits less than 1/10th of an inch.  Not a problem until the small drill doesn’t turn when the power is cut on.  This is what I use to drill holes in my leather sheaths for stitching them.  Dang!  Now what am I gonna do?


In need of a bandsaw, I purchase a benchtop saw from ebay…as is, looks like new in box.  Not a bad price.  Delivered right to the shop.  Open the box and the base is bent and a couple parts are missing.  Luckily as a homesteader and artisan I can whip this thing back into shape in less than half an hour.  No need whining about it just get it ready to use.  Next thing is to mount it to a base and set it in place of the big bandsaw.  Once it started running I was impressed at how well it cuts.  There is so much backlog of work in the shop that I waste no time in cutting out different wood items to get ready for upcoming shows.  Forward one week…get to shop after work, knife handles need to be shaped.  Flip the switch, NOTHING!  This can not be happening.  Oh it is, it is happening!

That makes four machines that have commited suicide within one month in my shop.

We had a show coming up soon so my gears switched to knives.  Working on four new knives had me scrambling for a new drill press to do sheath work.  A good friend picked one up for me in Nashville.  That was a great help to me.  Sheath work was going to get done without incident.  So I thought.  The leather sheaths were made, drilled, stained and stitched. 

There was one kydex sheath to make so the material was cut.  Next it goes onto a griddle to heat so that it can be formed.  All is going well.  From there it goes into a foam press that forms it around the knife.  I turn to get something…(wait for it)…and yank the griddle to the floor, breaking the plastic legs underneath. 

A man can only take so much.  So what do I do?  I STOMP the crap out of that griddle.  My poor wife witnessed the whole event with her jaw dropping to the ground.  Luckily the sheath turned out fine.  Keep focused.  Get ready for the show!

Our first show of the year was March 8th in Fayetteville, TN.  It was hosted by the Elk Valley Crafters Association.   We were surprised that we had more space than we thought.  So I had to run to Walmart to buy another table to set up.  It turned out to be a nice day and we enjoyed ourselves talking with everyone.

The next weekend my mother-in-law came down to visit.  As we were giving her and her friend a tour of the house, I hear some weird noise coming from our bedroom closet.  What the?  Shucks it’s just the water heater spewing hot water from the top access plate.  It’s a long way to the water meter so I set out running.  The next 6 hours are spent taking out the old water heater, driving 35 miles to get a new one and installing the new water heater. 


At this point there was no need to smash things.  Keep a smile on the face and take it all in stride.  We decide to call our wonderful friend to go through the house and shop with her positive words and burning sage. 

Well that seems to have turned things around for us.  I got my big bandsaw running and it is working better than ever.  We had a good Blooming Arts Festival in Linden, TN last weekend.  The weather was supposed to get rough but that never happened.  So many nice people came to our booth and had good things to say.  Can’t wait for the next show.  That’s it for now.  Been so busy in the shop trying to put a bunch of knives together. Hope the weather starts to warm up for everyone soon.  Flowers are blooming and trees are starting to bud here.  See Y’all Soon!

Saturday, January 11, 2014

Happy New Year???


Happy New Year to Everyone!!!

We partied with friends to usher in the New Year.  It was decided to celebrate an early time zone New Year so everyone could leave early.  I woke up in the middle of the night with a cough.  The rest of the week was spent holding down my easy chair.

The deer hunting season has sadly ended at 5:17 p.m. Sunday, January 5, 2014.  It was a very wet and cold ending with nothing seen all day.  Neither Leslie or I harvested a deer on our property.  We tried.  Oh Yeah!  Leslie especially has been in the woods as much as she was able to.  She was determined to bag something.  As for me, my time in the woods has been recently limited to afternoon hunts.  Our woods have been devoid of hoofed ungulates during hunting hours since the opening of the season.  Luckily we were given a deer from a good friend.  This will help us get through the year.   There are a few squirrels in those woods that I plan to harvest.

Before the rain started on Sunday I was working in the shop for a while.  I had to cut a piece of plywood for Leslie to use with her Wii console.  After finishing that I moved the hammer back under the 2-ton hoist so I could lift the flywheel/shaft off the frame.  There was a half washer brazed onto the back end of the spider.  This had to be ground off to allow the shaft to turn.  I can’t for the life of me understand why it was brazed on there in the first place.  It didn’t take as much work to get it off as I had anticipated.  The shaft was hoisted back up onto the frame and I was ready to put the bearing caps on the shaft.  They were tight the first time I tried so I cut a couple sheets of thick paper to use a gasket on both caps.  The shaft turns pretty easily now and after tightening it all back up I flooded the caps with oil to lube the shaft.  Oil flowed pretty freely out of the bearings but it took long enough for me to know that it will be oiled well while the machine is running.

One of the last things to do is to get the ram guide on properly.  The area that the guide attaches needed to be painted so that was done while it was still in the 50’s outside.  That was all that could be done for the day. 

My cat came into the shop and I noticed that her face looked really swollen on her left side.  She had a small cut by her ear for a couple days that seemed to stay open but now she was scratching the fire out of it.  After trying to look at it she ran off.  I knew she’d be back for food, so at supper time I caught her and put her in the house inside a cage.  With the extreme cold overnight I didn’t want her to deal with that along with whatever infection she has going on.  Hopefully it can be treated easily.  Another trip to the animal hospital.  It’s always something with these darn critters.

Took her in to the animal hospital on 1/6/14 as soon as I got home from work.  It turned out to be an abscess on the cats face.  They had to put her out, drain and clean the wound.  She gets to come home with a cone around her neck ans has to be kept inside for 10 days.  So I bring in a rabbit hutch from the barn and stuff her inside for the duration.  Luckily she's got a good disposition.  Can't wait for her to get the stitches out and let her outside again.

Leaving on a good note...at the time I posted this, I have the hammer about ready to go.  It has a small electrical issue that has to be addressed.  Seams like 2014 came in like a lion, lets hope the lamb stays with us the rest of the year.