Here at Arcadia Knives hand crafted knives have a soul. They are created with care, sweat and fire. If you are looking for a knife that you can pass down to your children then look no further.

Tuesday, November 19, 2013

All Dressed Up - LGPH Pt5


Nov 11
After cleaning everything up and assessing the damaged parts, it was time to start makin’ her look pretty again.  I stopped at the hardware store to pick out the color I want it to be.  My initial thought was a green as it had a green base color to it after I stripped it all down.  The final color ended up being Ace Safety Blue.  Next was to paint all the parts, giving at least two coats to protect every bit of it.

The frame was the first thing painted.  What a dramatic difference in appearance.  It didn’t take long to see how good this machine still looked. 

Next I painted the flywheel or Faceplate.  I can’t believe this is the same ships anchor I found in the woods.  A few of the other parts were also painted safety blue.

While I was elbow deep in blue paint I talked to Roger from littlegianthammer.com.  He gave me the only piece of history they had on it…the original Ship Date and Buyer.
No. 16 was shipped to F. Peterson of Madelia, Minn. on Monday March 9, 1908.  What a lucky guy.  Wish I knew what it did for most of its life.  I’m pretty sure Mr. Gene and his father had it for 40-50 years.


Nov 12
I had to use a die grinder to get a couple of the parts free of rust and grime.  Completed painting all the blue parts.  Now I need a little warm weather to paint all the smashy parts.  That would be the ram, toggle arms and the tread.  The tread also needed to be beaten back into shape as well as a mess of grinding to make it look good.

The rest of the night I spent racking a big double batch of beer into 2- 5gal carboys and 1- 2gal carboy.  These will help me through the holidays.

Nov 14
The weather warmed up enough to paint some of the last parts.  I went with a gray for contrast to the blue.  Parts were ordered from littlegianthammer.com and took drawings to a machinist to make 5 pins.  When all the parts come in I will be able to pre-assemble the hammer.  The only thing it need is a motor.  I placed an ad on Craigslist to find a used motor.  We’ll see if that pans out.


Nov 16  Homestead Work

Got a pic of the beast on the trail cam, a couple weeks ago, that’s been tearing up my barn and eating all my cats food.  Haven’t seen much of him lately.  This morning I finally caught this big ol’ possum.

Ain’t he scary?

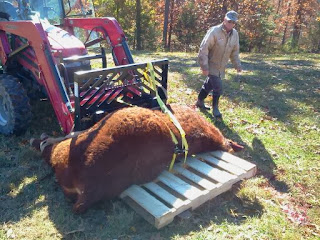
 Leslie and I went over to a friends farm to help butcher a steer that I put down the week prior.


 There were seven of us and it all went very fast.  We dealt with one quarter at a time.  Ribs and steaks were cut out of the quarters before we cut the rest.

Most of it was boned out and ground into burger or left cubed for stew meat.

I was really surprised at how similar it was to butchering a deer.  Which I do myself a time or two per season(Five times last year).  The steer was on a different scale though.

When we returned from the farm I dealt with Mr. Possum.  His pelt was prime after all the cold weather we’ve had.  After skinning him I fleshed the hide.  This was not my first attempt at fleshing but the first successful attempt.  If I was going to sell the hide I would have case skinned it, but I want to put it out on my show table for people to touch.  The hide was stretched on a flat board and borax was rubbed into the flesh to preserve it.  After it dries it should last through years of shows


Monday, November 11, 2013

The Move And CleanUp - LGPH Pt4


Friday afternoon, Nov 8th, a friend came over to help me get this hammer standing up after at least 15 years on the ground. 


We got the trailer backed into the shop with little to no room to spare.  I couldn’t see a thing once the trailer was partially in the shop, but Chase directed me in.  Hooked it to the 2 ton chain hoist and as it was raised it started to pull itself off the trailer. 


As soon as the base came off the back of the trailer, we attached the wooden platform/base.  After that it was easy to move.


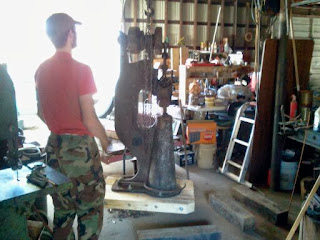
Here it is still hooked up to the hoist, in the air, waiting to be moved around into position.  I decided to set the whole thing on a few 6x6’s so I could work on the base first.


It has been a long time since she has stood on her own legs.  This is a happy me after touch down.

Took apart the whole front section of the hammer and disassembled everything.  I laid it all out on a table with cardboard so I could make notes about how each piece was configured.  I stamped a few parts with an “X” to mark position.

 ------------------------------------------------------------------------

Saturday  11/9/13
Muzzle loader hunting started this morning.  Before getting to my stand, a deer busted me by snorting and running off.  Only saw the ghost of a deer a little later.

Lots of stuff to do before working on the hammer.  Finally, I got to work on taking the bearing tops off.  This lead to the shaft- John Shaft.  For some strange reason this thing did not want to come off.  I hooked it to the hoist because it is heavy and too high to manipulate safely.  Hoisting it up it would raise one end off then the whole machine with me on it would raise off the blocks.  I tried and tried and tried again until it released its grip and raised up.  At that point I lowered it to waist height and unhooked it. 


Now it is almost completely disassembled.  She looks kinda naked.

---------------------------------------------------------------------------


Sunday 11/10/13
Today I put the LGPH onto my pallet jack to move over to the shop door.  My plan is to clean all the parts off with a wire wheel.  Big issue is lead paint used back in the day.  I started cleaning up all the moving parts- toggle arms, clutch fork, clutch collar, clutch pulley, crosshead, pitman, ram guide and ram.  Getting years of rust and crud off was very satisfying but took a couple hours of work.  Everything looked so different by the time I was done you wouldn’t have thought it was the same parts.


Next thing to clean was the frame.  For safety I wore a respirator mask and had a strong fan blowing to take all the lead dust out of the shop.  So I’m thinking they used lead based paint…but it was actually LEAD painted on!  Hate to be the guy who had to do that painting, talk about a deadly job.  It took a good while to get all the crud off the main frame.  After that I had to clean the lead paint off the flywheel.  The spider is also on the shaft with the flywheel and it needed to be cleaned more carefully. 

When I was finished I was covered with all kinds of soot and crud.  Time for a long hot shower.

Sunday, November 10, 2013

Before The Move- LGPH Pt. 3


As I document the rebirth of this machine I just want ya’ll to know that I have been on a quest for a hammer for a many years.  The way I work is to find things in a raw condition if I can, to not only minimize my initial investment but to put as much of myself into it as possible.  So it goes with this hammer.  You saw in the first hammer post my initial view of this hammer.  It was partially engulfed by mother earth, whose clutches entomb many pieces of our history.  Just having the chance to make something this old work again is an undertaking many would rather not bother with.  I hold onto the ways of our forefathers as my guide through life.  Create things of Substance.  Build things that will Last.  Keep things Simple.  Be responsible for Yourself and Family.  Be as Self Sufficient as you can.  Make what you can instead of just buying.


On Nov. 6th I felt the need to look at the LGPH as it was on the trailer.  This was really the first chance I’ve had to check it out.  Since it’s still covered with plastic to protect it from a couple of rains we had and strapped down to the sled, I was limited to looking at the left side of the machine.  My main reason was to locate the serial number. 

In the book “The Little Giant Powerhammer” by Richard Kern, he lists dates of manufacture for all the Little Giant models.

Before locating the serial number I applied penetrating liquid to all the spots I could reach.  My choice of penetrating liquid is a home made concoction of Automatic Transmission Fluid and Acetone mixed 50/50.  It looks like it will also take quite a bit of elbow grease to make dismantling easier.

I found the flat spot on the back of the main riser.  It had to be cleaned out with a wire brush for me to read the number…


This is only the 16th 25 pound Little Giant Trip Hammer built.  It was produced in 1908 in Mankato, MN.  The 25’s just don’t get any older than this.  After looking at the website littlegianthammer.com and scouring through all the information and links I decided to give Roger a call to make sure parts were still available and to ask for this hammers history.


Roger told me that the older hammers were really built strong and he himself would prefer the old style.  His opinions made me feel better about the age of the hammer.  It is in great shape too without cracks and welds.  The term trip hammer was changed later as it is really a power hammer.

I know a lot of this may be boring to some but when you can work with something that has so much history it helps you see into the lives of those that may have used the machine before you. Next installment will be getting her to stand up for the first time in years.

Wednesday, November 6, 2013

First Base or LGPH WIP Pt 2


My new(old) Little Giant Power Hammer(LGPH) is still on the trailer that it was brought home with.  That doesn’t mean I haven’t been working on the project. 

First thing to do is make a wooden base for it using 4x4 lumber.  All eight pieces are cut to length and laid out so I can mark four drill holes for each piece.  Then pilot holes were drilled in each board.  After those were done I drilled the inside holes for 3/8” all-thread and the outside holes for ½” all-thread.  The all-thread rods were tapped through the 4x4’s until they hung out the ends.   Washers and nuts were put on each end and the extra rod was cut off with a cutoff wheel.  Everything was tightened up with my air impact wrench.  Miss Kitty did not help one bit!

I had done a rough dimension drawing of the base the day I brought the beast home.  To lay out the holes to be drilled into the wooden base I physically took a piece of paper and cut it around the holes in the bottom of the hammer.  This was then easily transferred to the wooden base.  Pilot holes were drilled.  11/16” holes were then drilled and a ¼” deep square was chiseled on the underside to countersink the head of the 5/8” carriage bolt.  It was offset to allow for the motor and pulleys.

Considering this hammer weighs almost 800 pounds, I figured once I attached it to the wooden base it would never be taken off.  Being the resourceful(cheap) guy I am, I found a can of rubberized undercoating spray for vehicles and decided that would be a great way to protect the machine base.  I gave it a couple coats and now have to wait a few days until help comes to get it off the trailer.